In this first demo post, I want to show how to create a simple website using Azure functions. This isn’t anything fancy and, more than likely, you won’t be attempting to do this in production, but it will still serve a purpose for us to get introduced to building functions. It is important to note that, when functions first became available, some people did, in fact, try to host their website(s) by using functions only. Why not? After all, they would only have to pay for the time the function actually ran. This could end up being a mere $1 or $2 each month. Microsoft got wind of this and put some mechanisms in place to prevent this sort of thing. We’re going to sidestep some of these mechanisms by hard-coding some HTTP responses. Again, this isn’t production-worthy.
Functions Application
Let’s start off by logging into Azure.
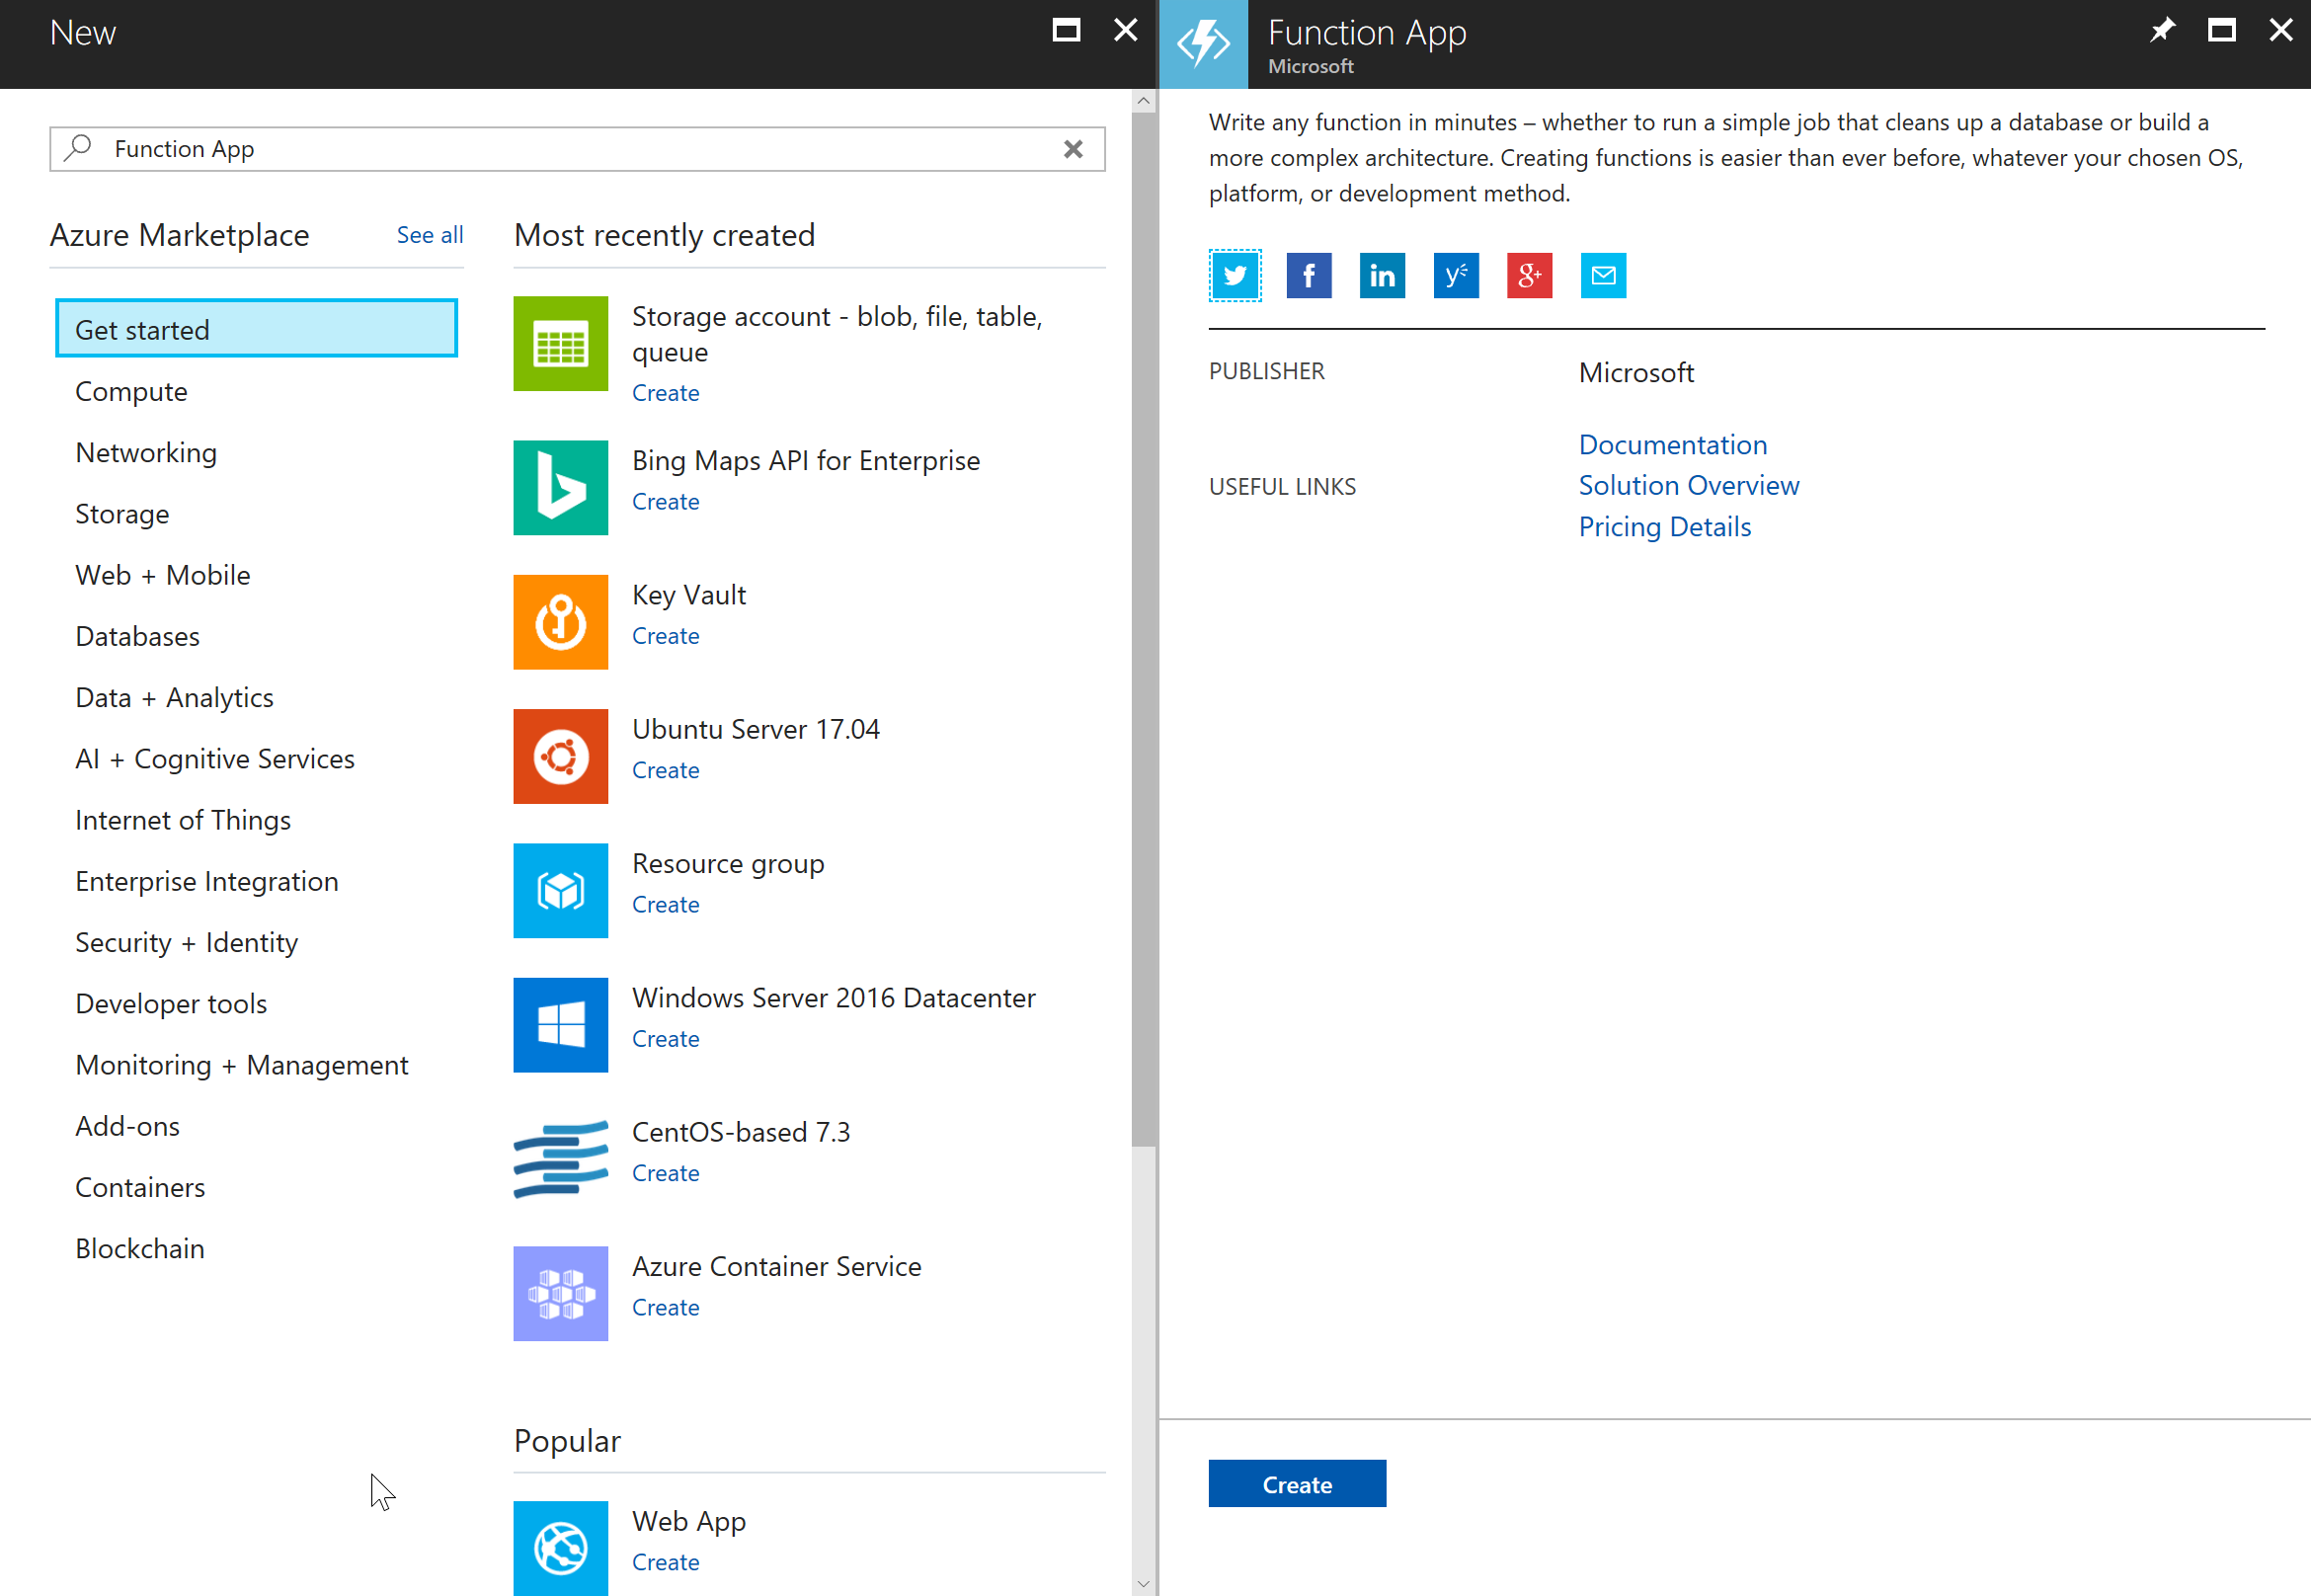
- Once you’re in the Azure portal, click on New
 .
. - Search and select from the Marketplace for “Function App”.

- Click Create.
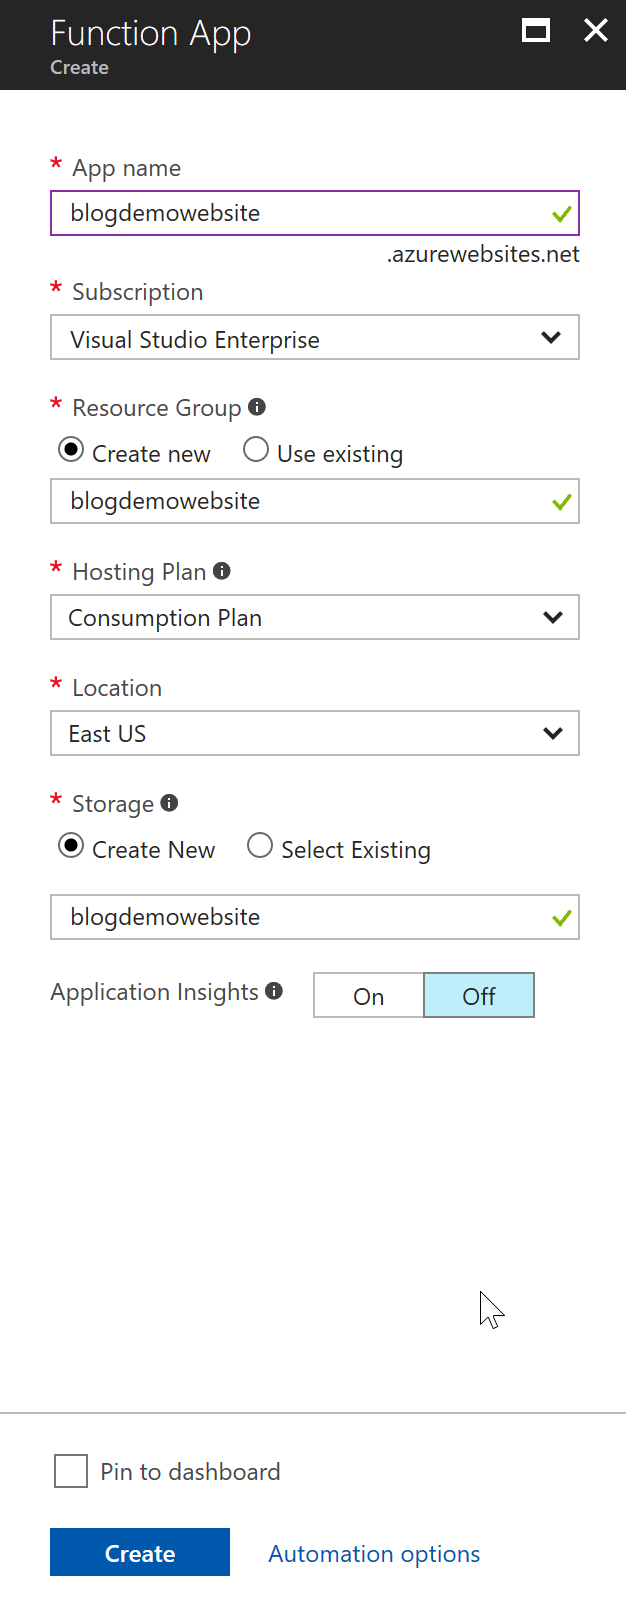
- In the next blade, you will need to provide some information:
- App name: <name your app>
You will need to provide a globally unique name for your application. This name cannot be currently in use by anyone else. - Subscription: <choose your subscription>
- Resource Group: <choose a pre-existing group or create a new one>
- Hosting Plan: Consumption Plan
- Location: <choose a location>
- Storage: <choose a pre-existing storage account or create a new one>
- App Insights: Off

- App name: <name your app>
- Click Create.
This process will create a functions application that will host your function(s). However, no actual functions have been created yet. Once Azure has completed the creation of our functions application (the portal will inform us of such), we can begin writing our functions.
Create the Function
Now that our functions application has been created, we can create the function for our simple website. Navigate to the resource group that was created in the steps above (e.g. in our case blogdemowebsite) and you’ll notice that 3 resources were created – an App Service, an App Service Plan and a Storage Account.

To begin, click on the App Service in your resource group.
This will display a blade that details your functions application.

The blade is provides a central location to control your functions application (keep in mind, this is the application that will host multiple functions) and configure various options. However, for this demo, we are primarily concerned with two items on this blade: 1) the URL; and, 2) the ability to add and/or switch between functions. Note the URL as you’ll need it for some steps below.
Let’s begin creating our function.
- Click the plus sign next to Functions.
- There’s a couple of boilerplate options we could choose for templates. We want to create a WebHook + API function because we will be handling web requests. We also want to choose JavaScript for our language. Choose these options and click Create this function. We are basically creating what’s known as an HttpTrigger function in JavaScript.
- You will then be taken to the source code for index.js. Replace the source code with the following:
var fs = require('fs');

module.exports = function (context, req) {
    context.log('JavaScript HTTP trigger function processed a request.');

    var page = (context.bindings.req.params.page != null ?
               context.bindings.req.params.page + '.html' :
               'index.html');

    page = __dirname + '/' + page;

    fs.stat(page, function(err, stat) {
        if (err == null) {
            fs.readFile(page, function (err, data) {

                res = {
                    status: 200,
                    headers: {
                        'Content-Type' : 'text/html'
                    },
                    body: new Buffer(data, 'base64').toString('ascii')
                };

                context.done(null, res);
            });

        } else if (err.code == 'ENOENT') {
            res = {
                status: 404,
                headers: {
                    'Content-Type' : 'text/html'
                },
                body: null
            };
            context.done(null, res);
        } else {
            res = {
                status: 500,
                headers: {
                    'Content-Type' : 'text/html'
                },
                body: null
            };
            context.done(null, res);
        }
    });
};
Most of the work is handled by lines 6 – 10. We are basically checking the web request for a filename passed in as a parameter. If a filename is not passed in as a parameter, then the default index.html file is returned. If a file is passed in and found (line 12) or the default file needs to be returned, then the contents read into a buffer (lines 14 – 21) and the contents are returned (line 24). If the file is not found, then an HTTP Status Code 404 is returned (lines 28 – 35). Finally, if any errors happen, then an HTTP Status Code 500 is returned (lines 37 – 44).
- Just above the editor, click Save.
That’s pretty much it to creating a basic web site application. There’s still a couple of other things we must do before our application is complete and ready to handle requests. We need to create a couple of HTML files, including our default, index.html. We also need to “wire up” the web request to accept our filename as a parameter. Finally, we need to set the authentication policy to allow anonymous access.
Create Our Pages
We, obviously need some pages for our website to serve up. We’re going to create two: 1) the default index.html; and, 2) a second page, temp.html, to prove that our page routing is working.
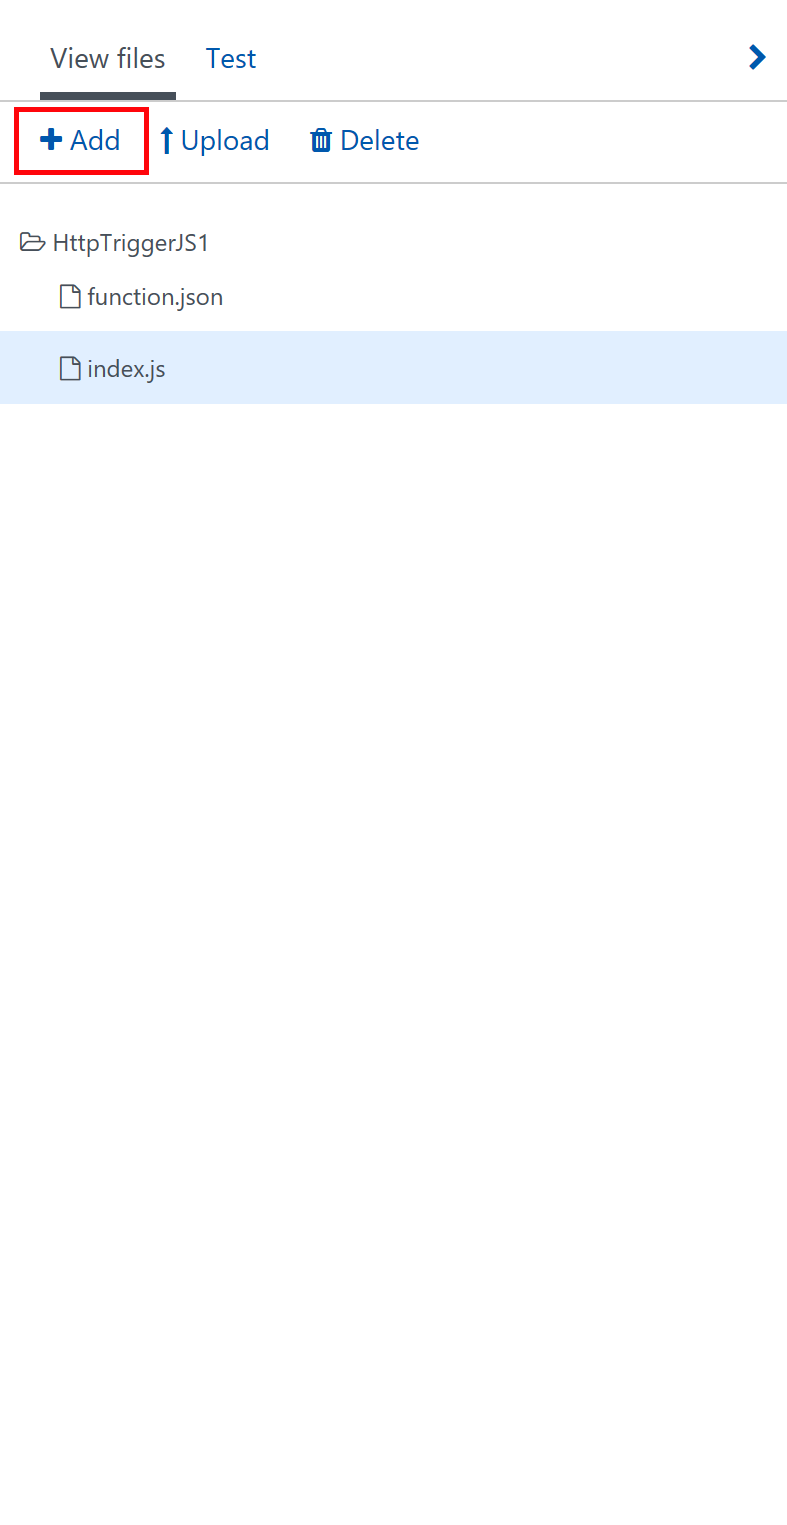
- To the right of the source code editor, you’ll see a sidebar containing two links (View Files and Test) and an arrow to expand or collapse the pane. If it is not already expanded, click the arrow to expand the sidebar pane.
- With View Files selected, you should see the function’s folder listing the two files function.json and index.js. Index.js is our functions code; function.json is part of our function’s configuration that we’ll explore below.

- Click Add.
- For the filename, type: index.html
- In the source code editor, type (or copy and paste) the following HTML and click Save.
<html>
<head><title>Functions Test</title></head>
<body>
<h1>Testing Functions</h1>
<em>index.html</em>
</body>
</html>
There’s really nothing special about this source code. The only thing is on line 5 we are stating which file we are serving. In this case, it’s our default index.html.
- Once you’ve saved this file, click Add again to add a second file.
- For the second file’s name, type: temp.html
- In the source code editor, type (or copy and paste) the following HTML and click Save.
<html>
<head><title>Functions Test</title></head>
<body>
<h1>Testing Functions</h1>
<em>temp.html</em>
</body>
</html>
Again, nothing special. Just our 5th line telling us which file we are serving.
We’ve now created our two static pages. Technically, if all we were serving were static pages, some CSS, JavaScript and some images, we could tweak our function to handle all of these conditions – just changing the Content-Type Header based on what type of files we were serving. Microsoft wouldn’t be too keen to this, but we could do it.
Configure Bindings
We now need to configure our function to handle requests bound to a specific URL path and to accept anonymous requests (e.g. requests that do not require authentication). I won’t cover every configuration element in this section, just the two that are specific two our needs for this demo.
- While we still have the View Files pane expanded, click on the functions.json file.
- Replace what you see in the source code for the functions.json file with the following:
{
  "bindings": [
    {
      "authLevel": "anonymous",
      "type": "httpTrigger",
      "direction": "in",
      "name": "req",
      "route": "website/{page?}"
    },
    {
      "type": "http",
      "direction": "out",
      "name": "$return"
    }
  ],
  "disabled": false
}
What we really care about are two lines, 4 and 8. Line 4 sets the authentication level to anonymous allowing anyone to access our function without authentication. Line 8 defines our route with a optional parameter, namely page. The syntax you see for our route sets the URL directive for our route to start with website. Then, the {page?} tells our route that an optional string can be passed. Remember our code above will look for this page parameter. If supplied, it will attempt to serve the page; if it’s not supplied, the default index.html will be served. For those of you familiar with MVC, this is exactly the same concept as Attribute Routing.
Install Dependencies
The last thing we need to do is install dependencies for our JavaScript (Node.js) application. If you look on Line 1 in our index.js source code above, you’ll see we reference a library fs. By default, none of the Node.js libaries are installed, so we need to install this manually. If there’s a “tedious” step in this demo, this is it – not difficult at all, but can be confusing if you’re not use to do this. So, I’ll go slow.
We need to get to a console on the host machine in order to install dependencies. We’ll do this in a separate browser window. But first, let’s remember the URL to our function application that I asked you to remember above. For my demo, it is https://blogdemowebsite.azurewebsites.net. Your’s will be different.
- In the separate browser window, reenter the URL, but insert .scm between the hostname and azurewebsites.net. In my example, the resulting URL will be https://blogdemowebsite.scm.azurewebsites.net. This will open kudzu. Among other things, kudzu gives us access to our application server’s console.
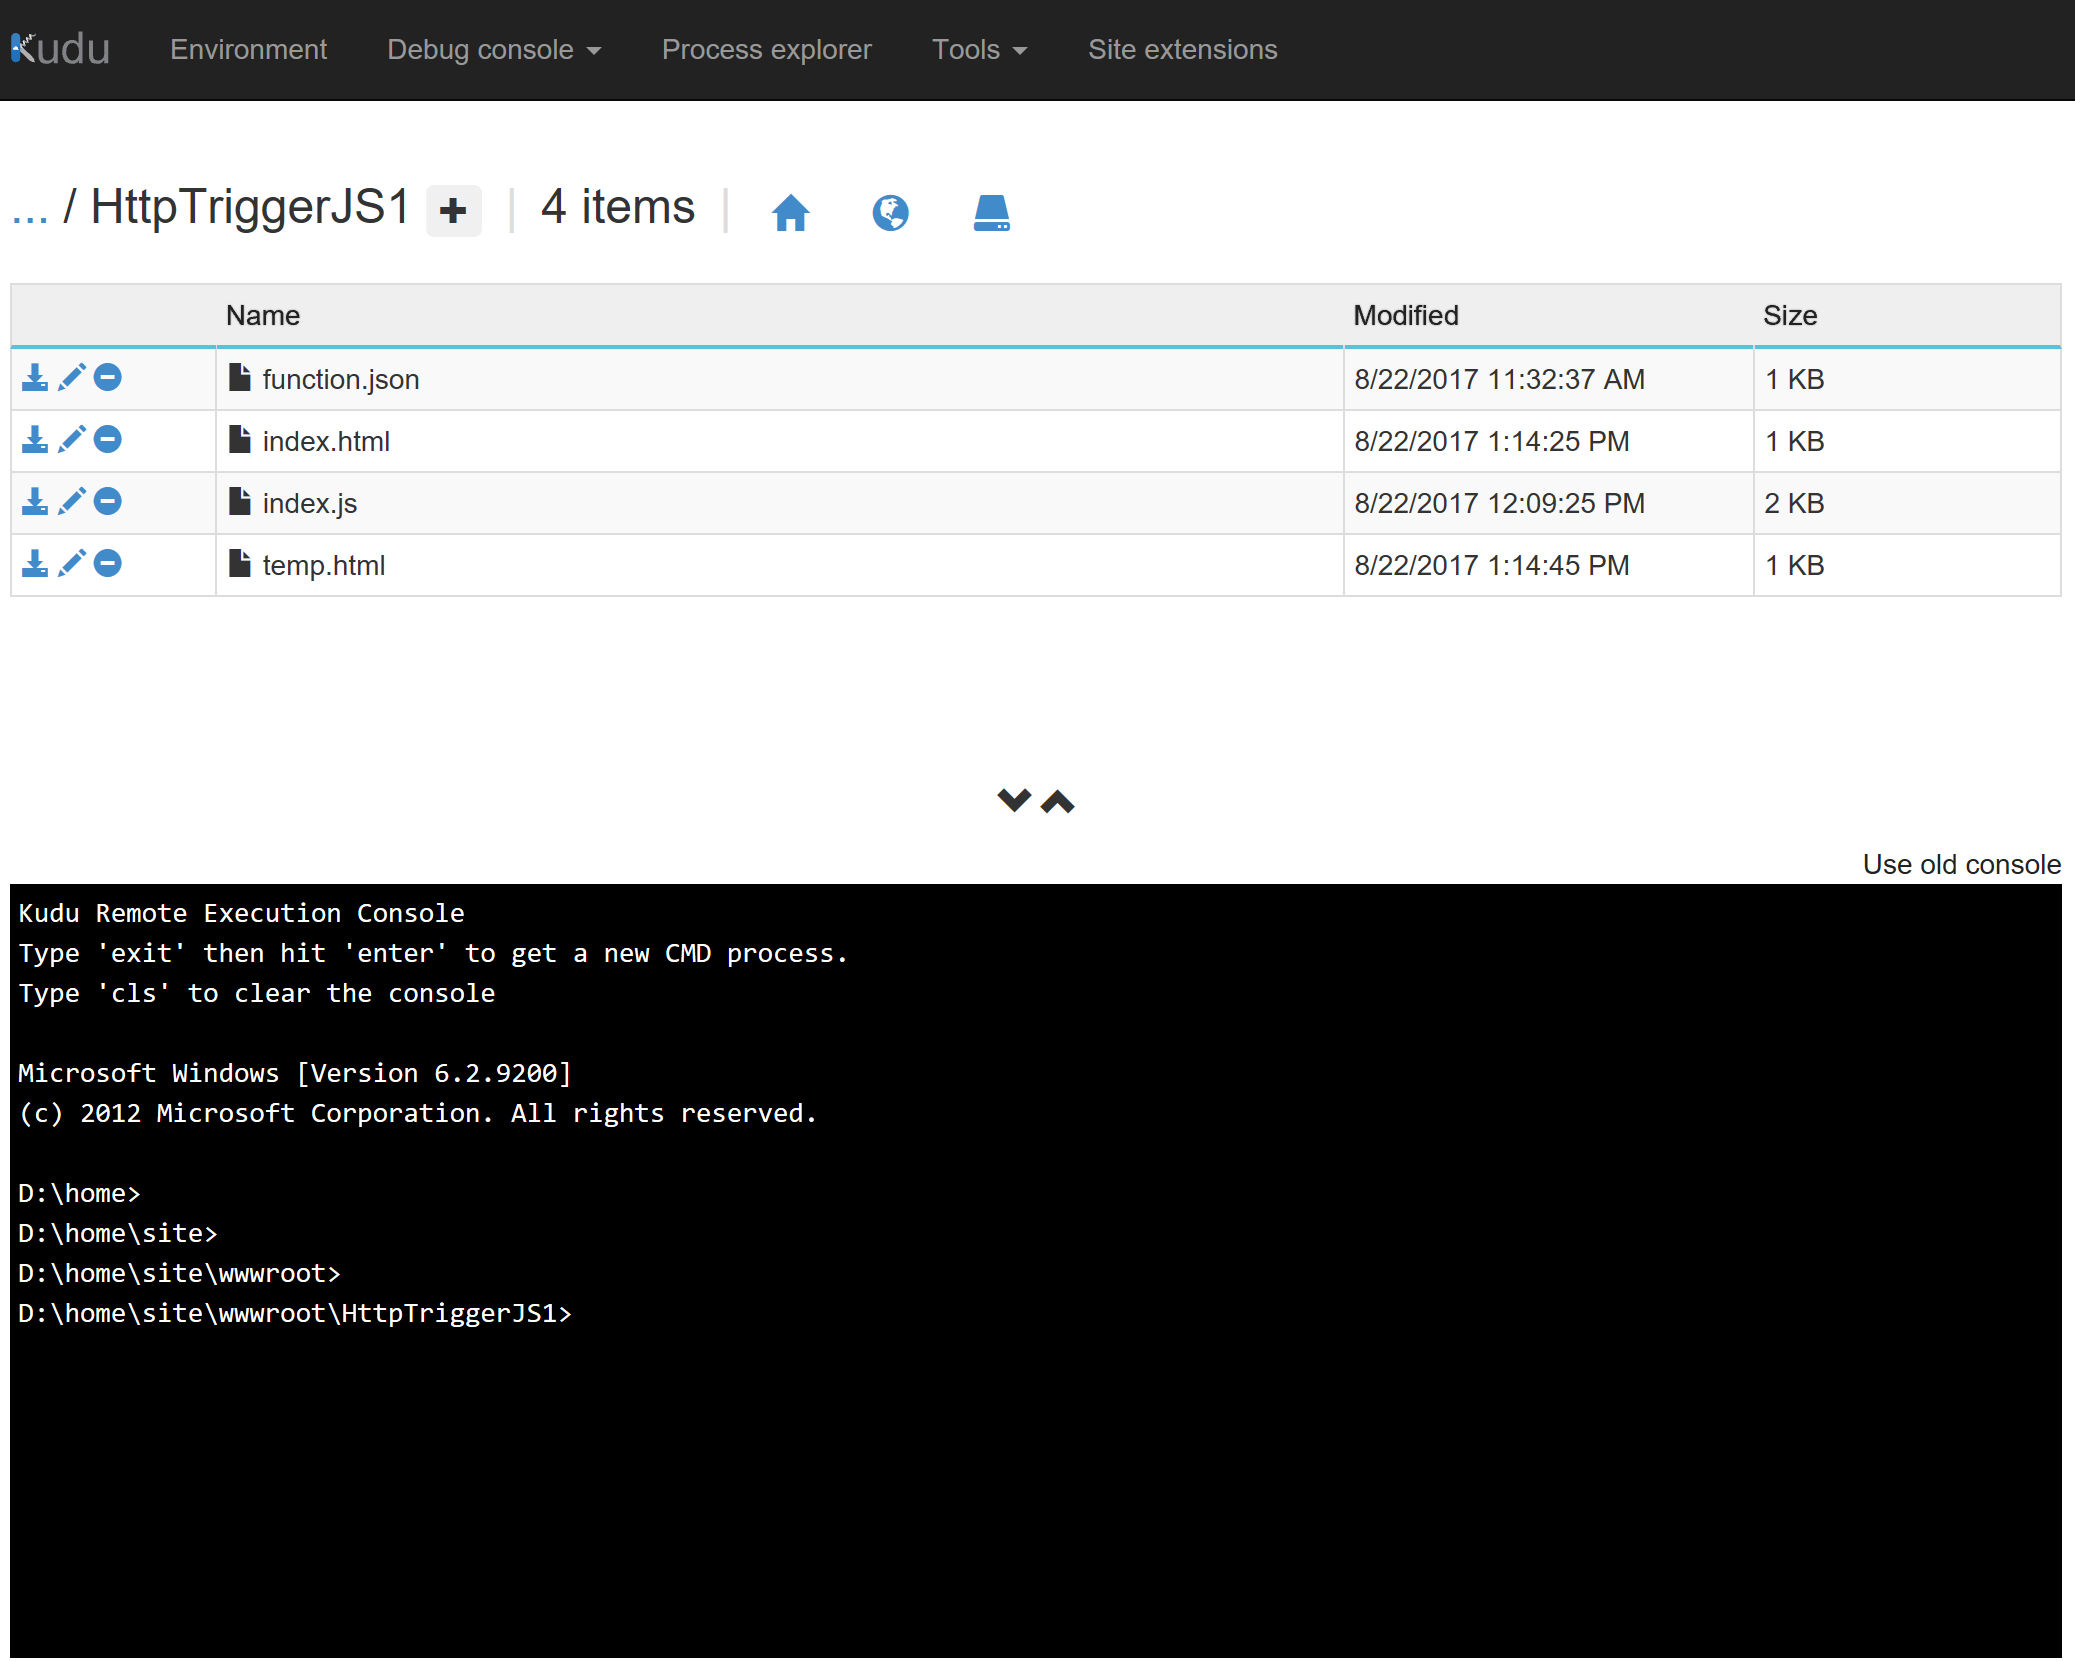
- In the top menu bar, expand Debug Console by clicking on it, then click CMD. Doing this will reveal a file explorer-type interface and a command prompt window. For those of you familiar with DOS commands, feel free to use them. However, I’m going to keep it simple for those of you who aren’t.
- In the explorer interface, click on site; then, wwwroot; then, HttpTriggerJS1. The files here should look familiar. They’re the same files we created in our functions blade.

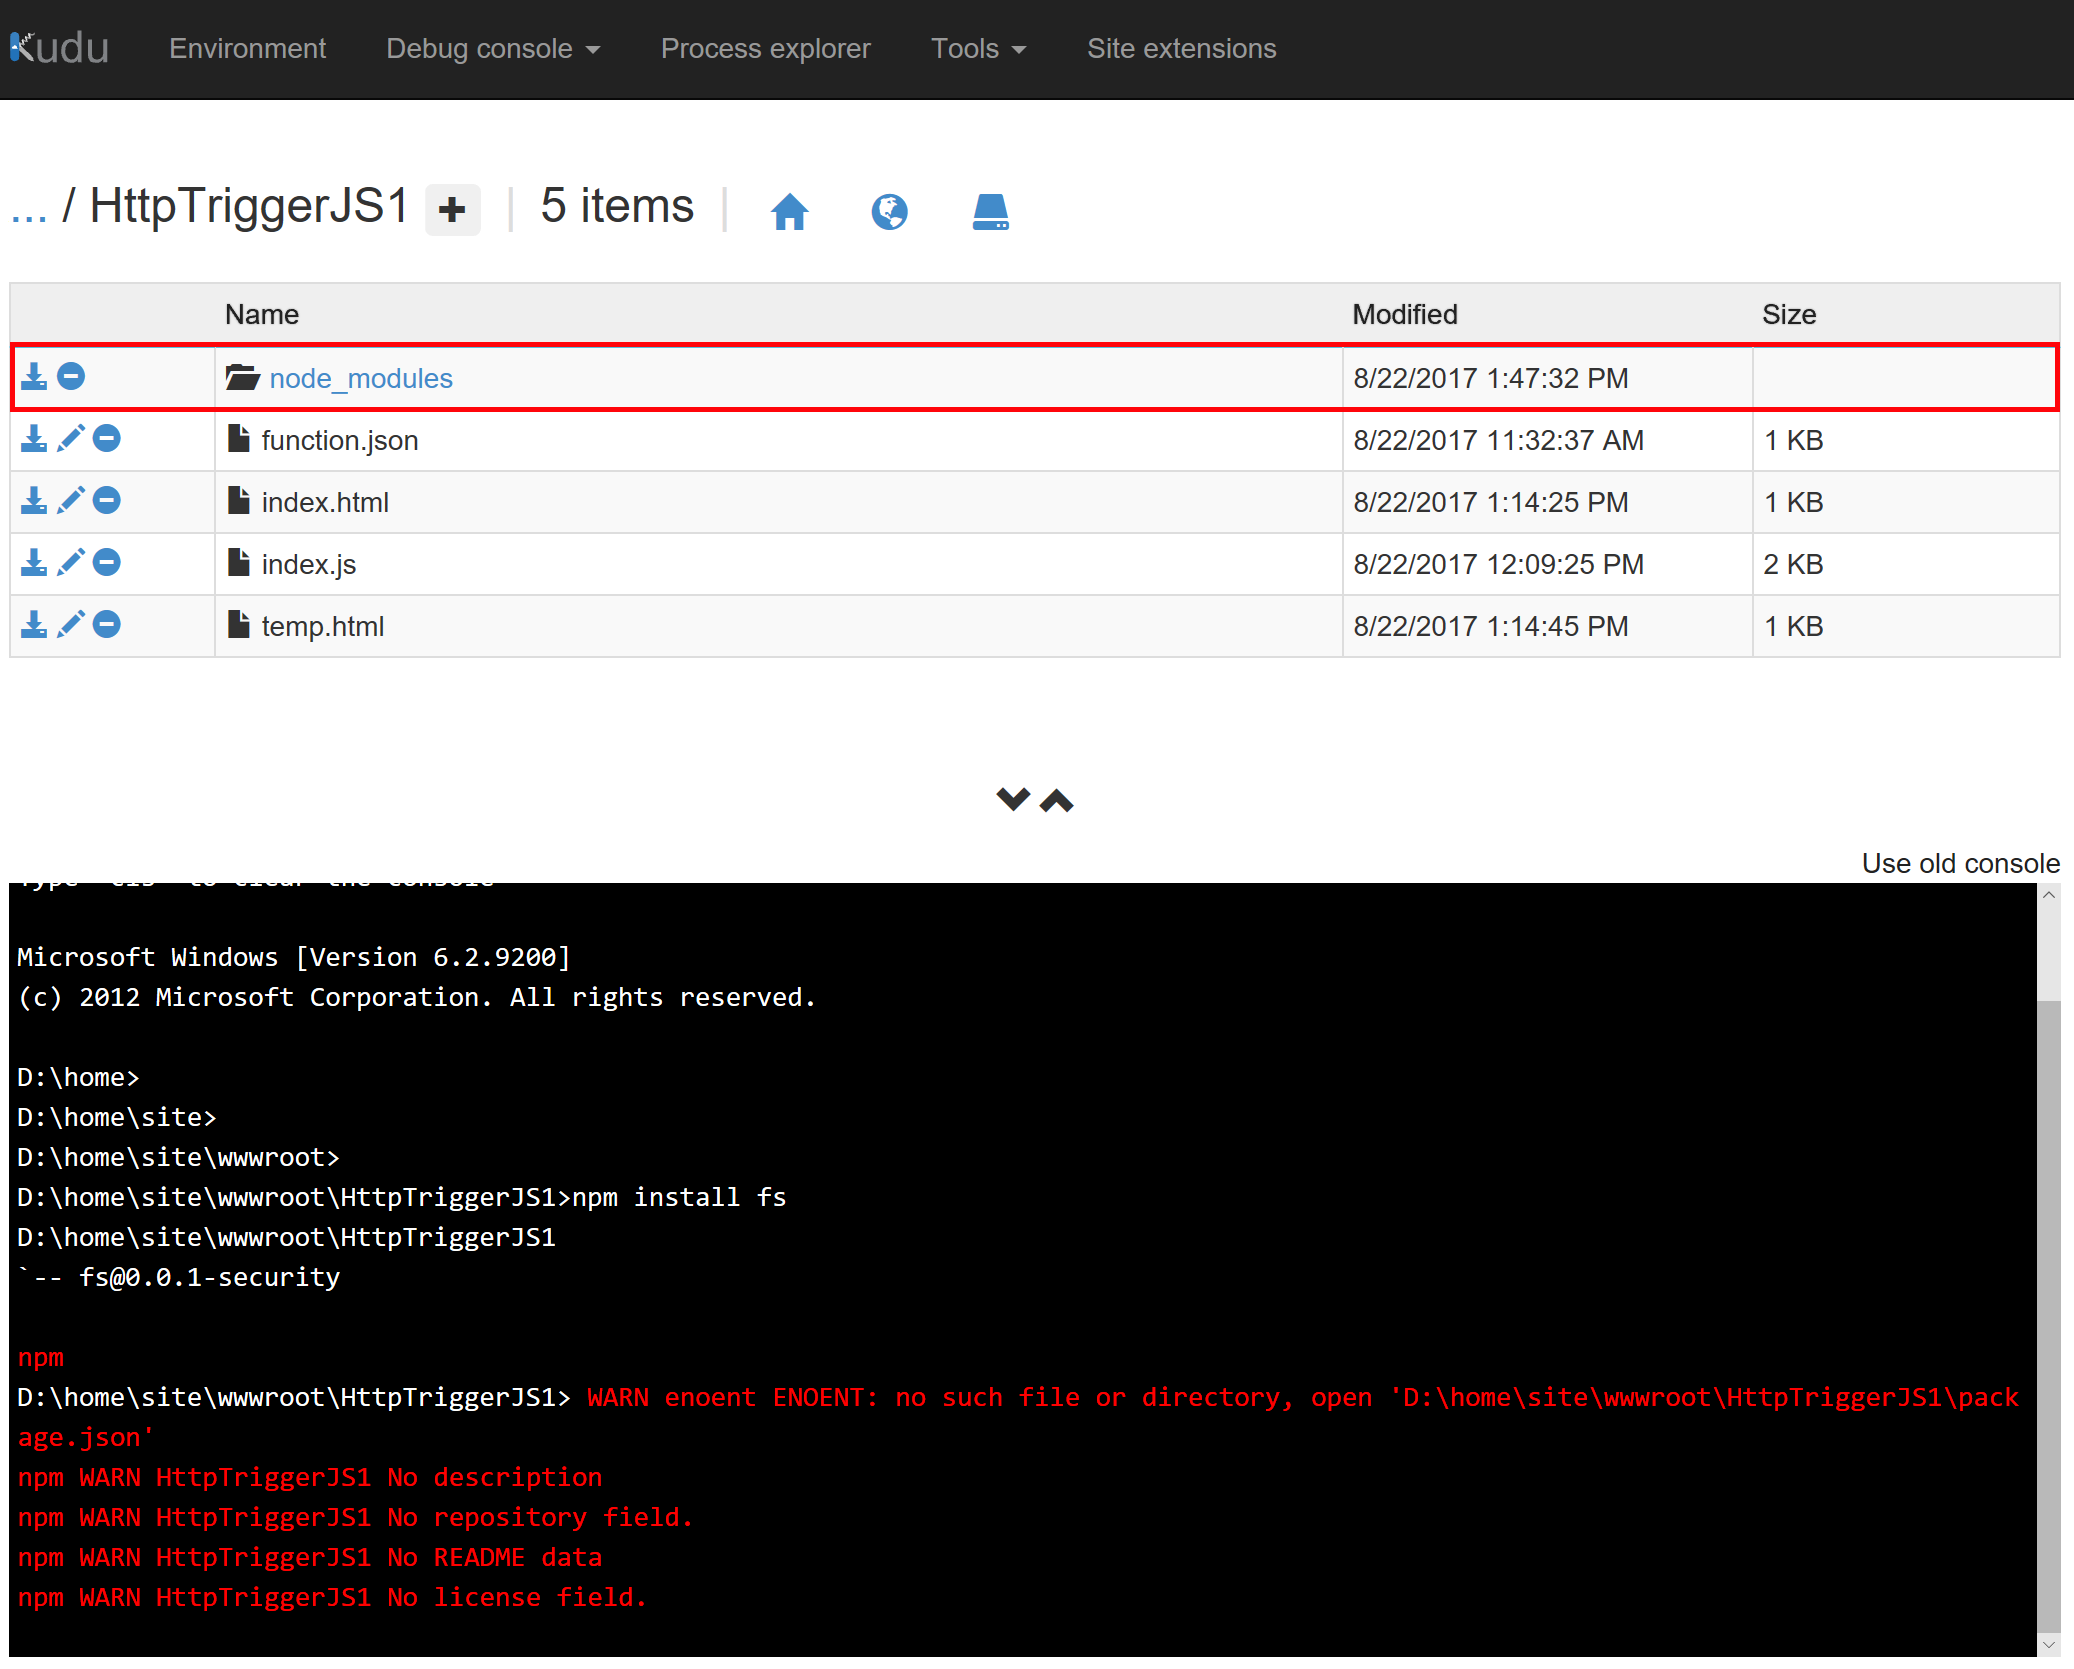
- At the prompt in the bottom console window, type: npm install fs
- Press Enter
- This may take a minute or two and you might not think it’s doing anything. But, the operations here are synchronous. Therefore, nothing will show up on the screen until the entire process has completed.
- Once it has completed, you may get some red error messages. Just ignore them. What’s important is you should see a new folder created in the file explorer above, node_modules. It’s not required, but if you click on this folder, you will see our fs dependency has been installed.

Running Our Function
Congratulations! You’ve now completed creating a simple website function. Let’s test it.
NOTE: At the time of writing this post, there’s a bug in the functions portal. I’ve logged it with Microsoft. For your function to pick up the anonymous authentication changes, first click on Integrate in the left menu under your function’s name, then click back on your function’s name.
- Back in the Azure portal, on your function page and just above the source code, click Save and Run (or just Run). Your function should be running already, but we do this just in case.
- Now, again taking your function application’s URL and appending the route we configured above (e.g. website), open a new browser window and navigate to the URL. (My resulting URL would be https://blogdemowebsite.azurewebsites.net/website/. Your’s will be different.)
If you’ve followed the instructions above (including the previous note), you should see the contents of your index.html file.

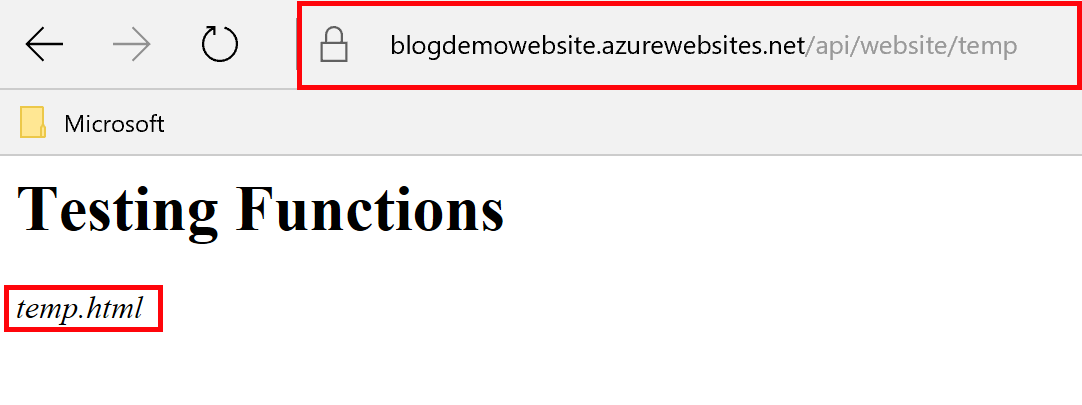
Let’s test out our two other options:
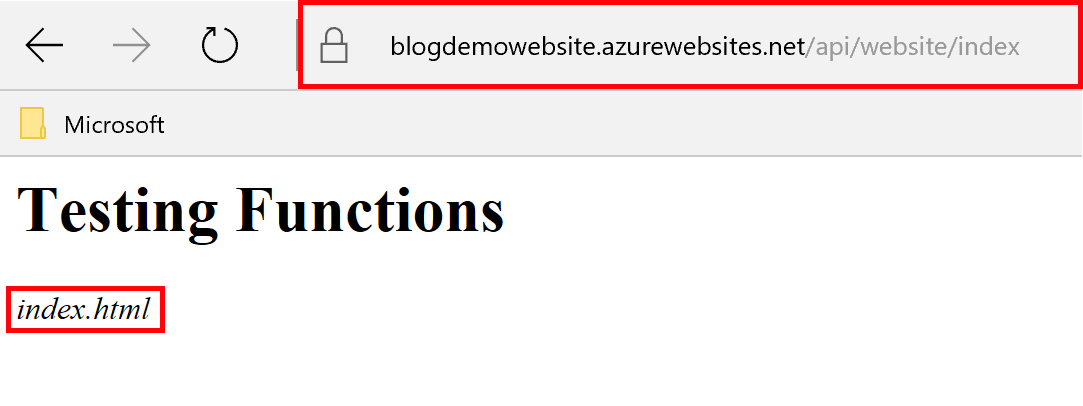
First, append index to the end of your URL. Again, you should see the contents of your index.html.
Second, replace index in the URL with temp. Now, you should see the contents of your temp.html.