I have been hosting this blog on WP Engine for a couple of years and my experience has been fantastic. A while back, I explored moving my blog to Azure, but in order to have the same high-availability that WP Engine offered, I would be required to construct a load-balanced WordPress IaaS implementation – installing, configuring and managing the WordPress app environment and the MySQL database (VMs, load balancers, firewalls, etc.). Additionally, I could have chosen to use ClearDB as the MySQL provider. But, all in all, creating a linux-based high-availability environment would be considerably expensive.
Just recently, Microsoft released two new features in Azure – Azure Service Plan on Linux and Azure Database for MySQL Server. These two components allow me to run a full PaaS implementation of WordPress. Continue to read to learn how to install WordPress on a Microsoft Azure PaaS environment.
This post is a couple of pages long, but I assure you it’s a very simple process. I’ve spanned it over a couple of pages for clarity.
Prerequisites
For WordPress on Microsoft Azure, we’re going to utilize three Azure products. Two of these products, Azure Service Plan on Linux and Azure Database for MySQL Server, are required. The third product, Content Delivery Network (CDN), is optional, but will increase the performance of your WordPress installation.
Azure Database for MySQL Server
Create the Database Server
In the Azure Portal:
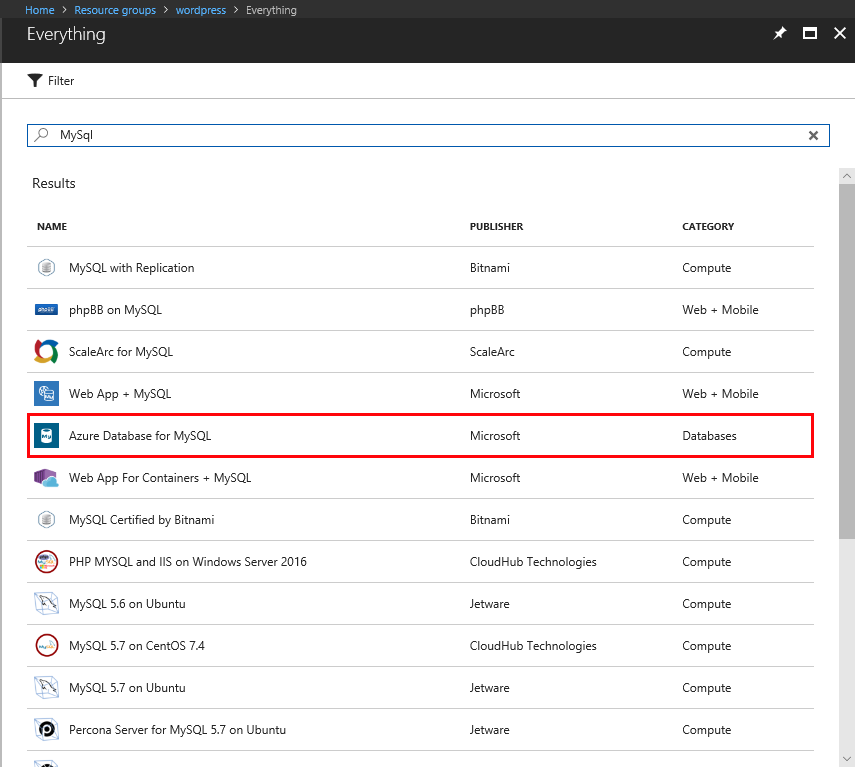
- Add a new resource to your Resource Group. The resource you’ll need to add is Azure Database for MySQL.

- In this example, we’re going to setup a relatively small blog database, but should be sufficient for our purposes. We’re still going to ensure that the database has geo-redundancy in the case of a regional outage. Please complete the form similarly to what you see below.
(NOTE: The Server name must be globally unique among all Azure customers.)

- Once you have the information entered and the options selected, click Create.
- Creating the database may take a minute or two.

Create the Database
We’ll now need to create an empty database with a user and grant that user the correct permissions. First, in order to connect to the database, we’re going to need to create a firewall rule to: 1) allow our local IP address; and 2) to allow Azure resources to connect to our database.
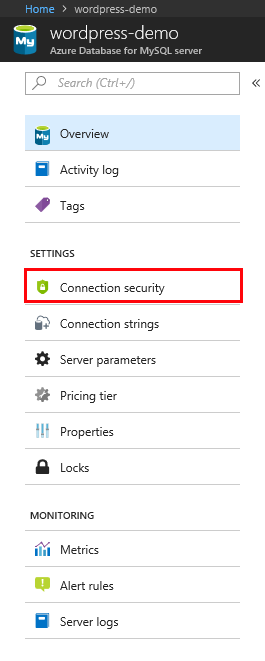
- On the MySQL database blade, click on Connection Security on the left menu.

- In the top menu, click Add My IP. Your local IP address and a named identifier is automatically added to the firewall rules.
- Next, click On for Access Settings to allow Azure resources (e.g. the App Service) to connect to the database.
- Finally, click Disabled for Enforce SSL connection. (See note below image.)

- Click Save on the top menu.
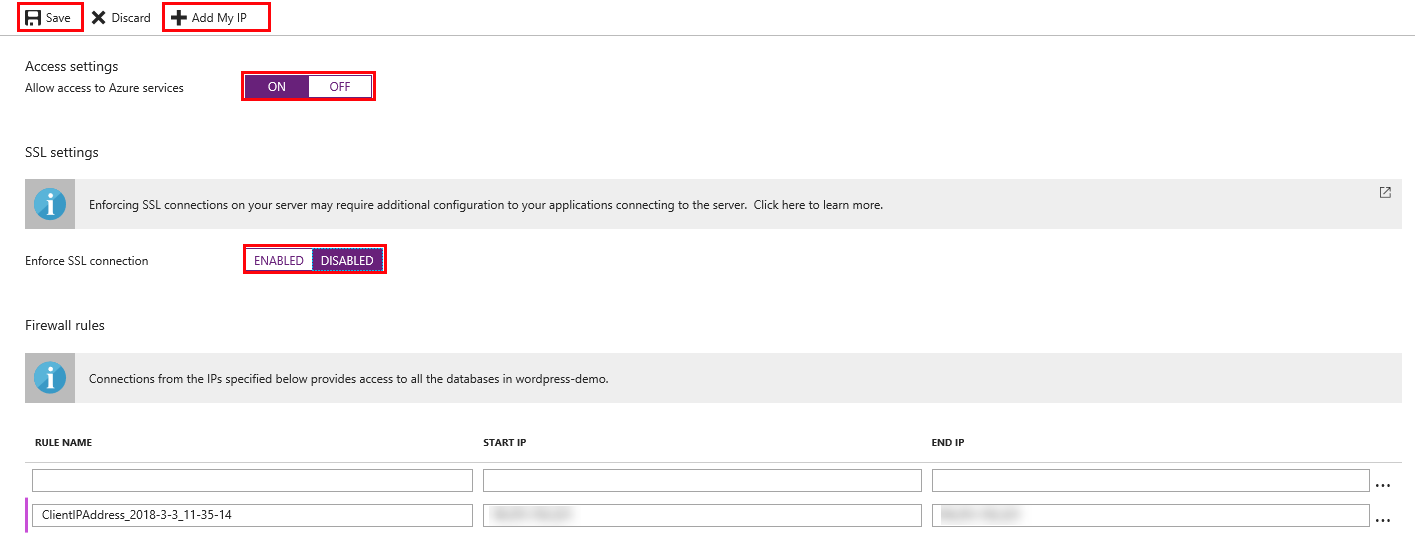
WordPress has a hard time connecting when “Enforce SSL connection” is enabled. By disabling it, we can connect to the database via SSL if we choose, but we’re not required to. When we connect to the database from our local machine, we’ll want to use an SSL connection to keep our data protected. However, the connection between our App Service and MySQL server doesn’t technically require an SSL connection because, in Azure, all data is already encrypted in transit. So, in actuality, encrypting a second time might incur some small performance degradation.
Now that we’re able to connect to the database, we’ll need an application that will allow us to actually do so. If you’re a Linux savvy person, you may already have the necessary tools for connecting to a MySQL server. For this tutorial, I’m going to assume you’re not, so let me suggest a free, cross-platform MySQL client, Sqlectron.
The app doesn’t require installation, just decompressing the file. Once decompressed, run the Sqlectron client.
- Once the app starts, click the green Add button.
- In the Server Information screen, complete the form as you see below.
A couple of notes:- If you are unsure (or can’t remember) your server name or username, you can find the information on the Overview page of your MySQL server blade
- As discussed above, we are enabling SSL for connecting to the database from our local machine
- The username format is <username>@<hostname> (In my case, it’s wordpress_admin@wordpress-demo)

- Click Test and, if successful, click Save.

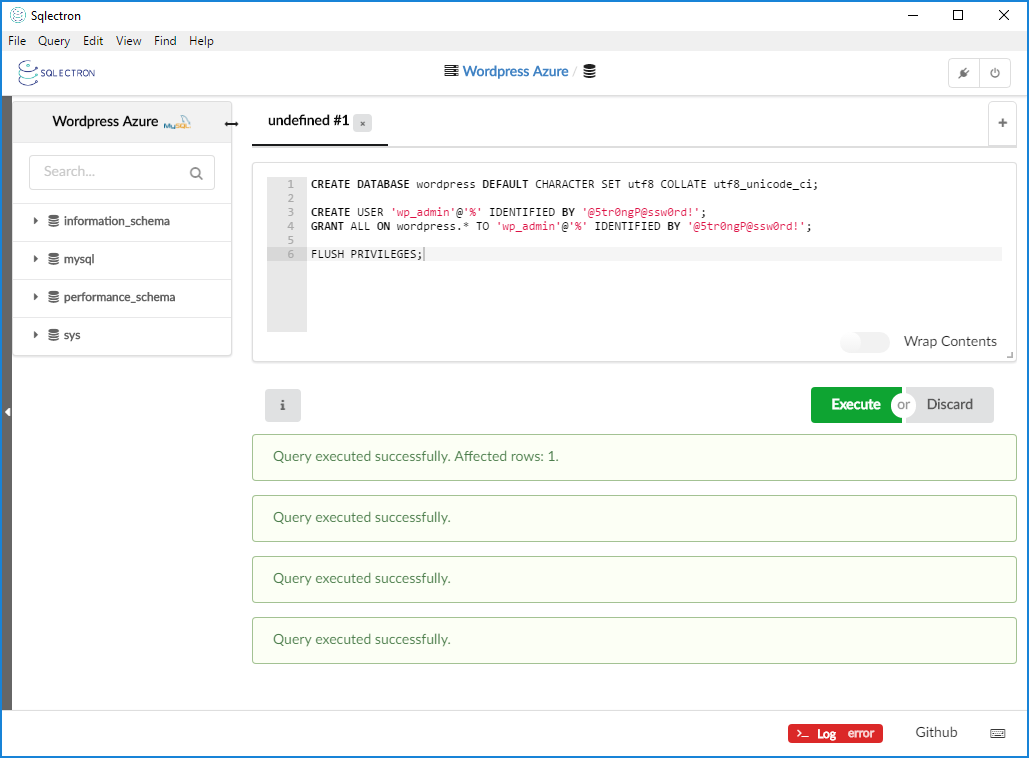
Once you’ve saved your successful connection and returned to the main screen, click Connect under your new connection. At this point, we basically have three commands that we’re going to enter into the query window. You can enter each command individually and click Execute after each, or enter them all at once and click Execute only once. Your choice.
Create Database
In the below command, feel free to change the database name from wordpress to whatever you’d like.
CREATE DATABASE wordpress DEFAULT CHARACTER SET utf8 COLLATE utf8_unicode_ci;
This creates a database with the given name (remember the name you choose) with the specified character set and collation.
Create User
We don’t want to connect to the database using our current administrative user. We want to create a user that specifically has access to this database. This is useful if, like me, we want to host multiple WordPress instances using a single MySQL instance (one wordpress database/user per WordPress instance).
For this step, you’ll need to choose (and remember) a username and password. You’ll also want to replace the database name below with the database name you chose in the previous step. When specifying the username, we’ll need to do so in the format 'username'@'%' which specifies a local user within the MySQL database.
CREATE USER 'wp_admin'@'%' IDENTIFIED BY '@5tr0ngP@ssw0rd!';
GRANT ALL ON wordpress.* TO 'wp_admin'@'%' IDENTIFIED BY '@5tr0ngP@ssw0rd!';
Save Permissions
We just created a user and assigned permissions for that user against our database. We’ll now need to persist those permissions.
FLUSH PRIVILEGES;
Remember to click Execute on the steps above and you should receive a message stating that the Query executed successfully.
Linux Web App
Create Web App
In the Azure Portal:
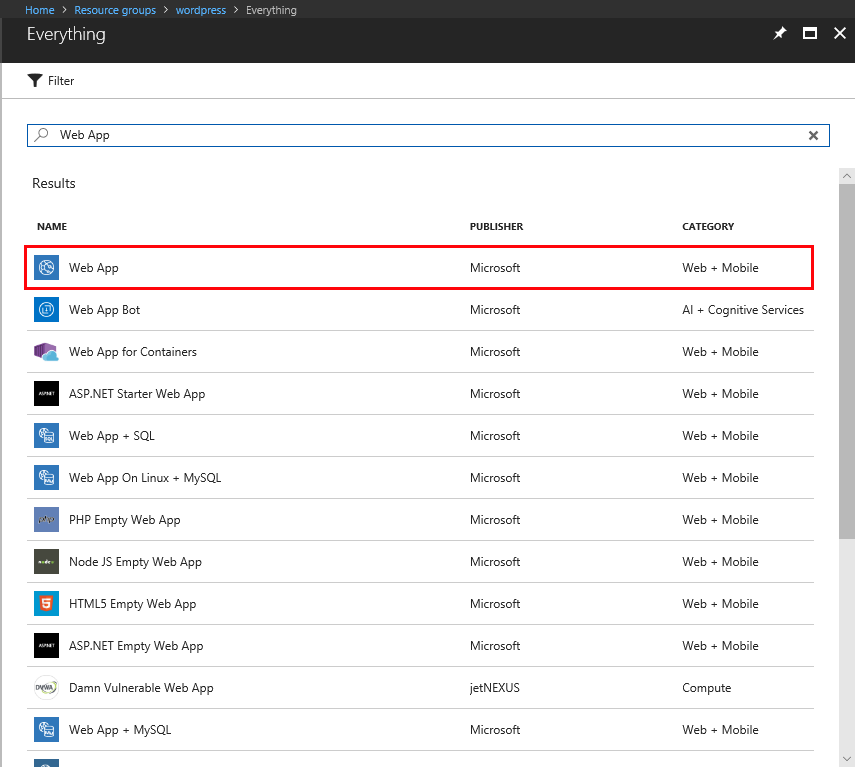
- Add a new resource to your Resource Group. The resource you’ll need to add is Web App.
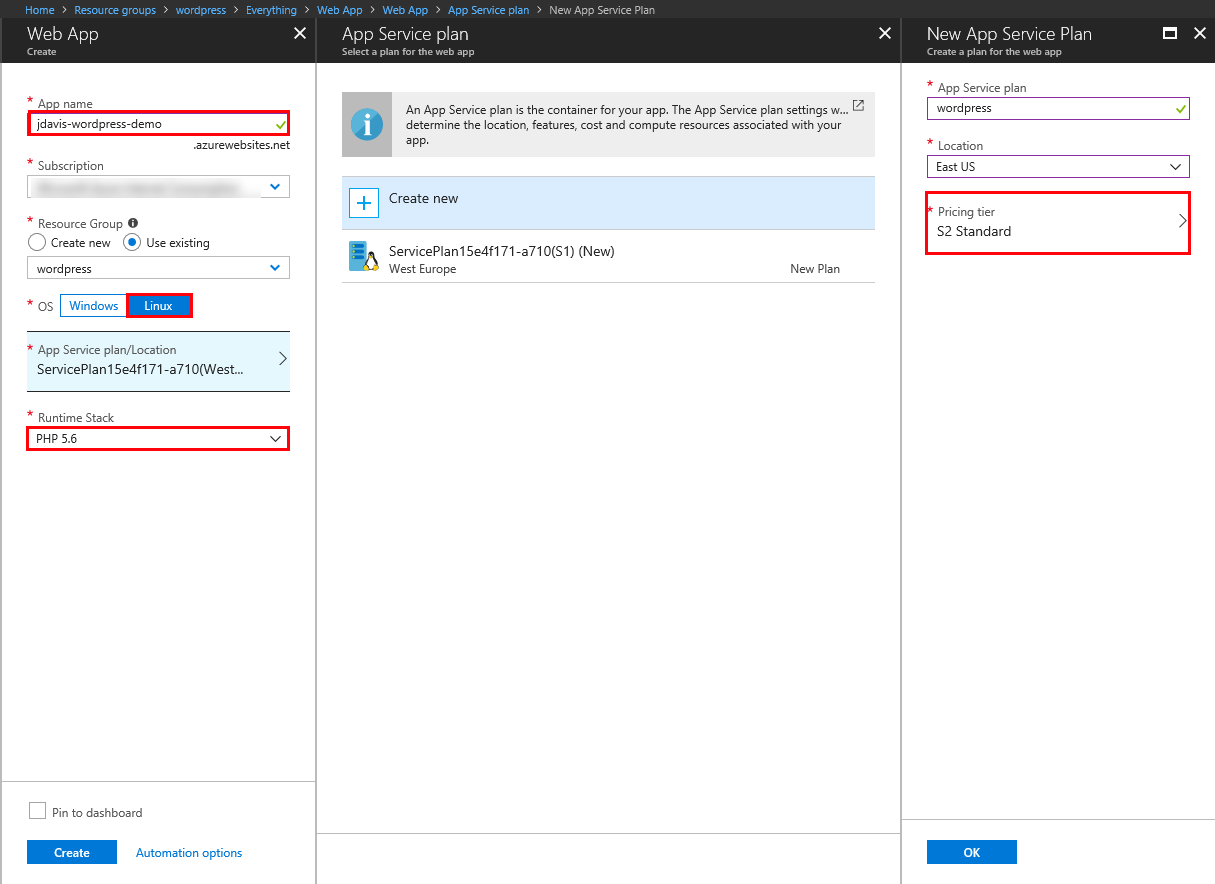
- Please complete the form similarly to what you see below.
A couple of notes:- The App name must be globally unique among all Azure customers.
- Important: OS should be Linux
- App Service plan recommendation is S2 Standard, but you can scale this up or down as you need to tweak your performance
- Important: Runtime Stack must be PHP 5.6. While WordPress itself is compatible with newer versions of PHP, at the moment, not many plugins are and you will experience issues if you choose anything besides 5.6.

- Once you have the information entered and the options selected, click Create.
- Creating the web site/app may take a minute or two.
Scale Web App
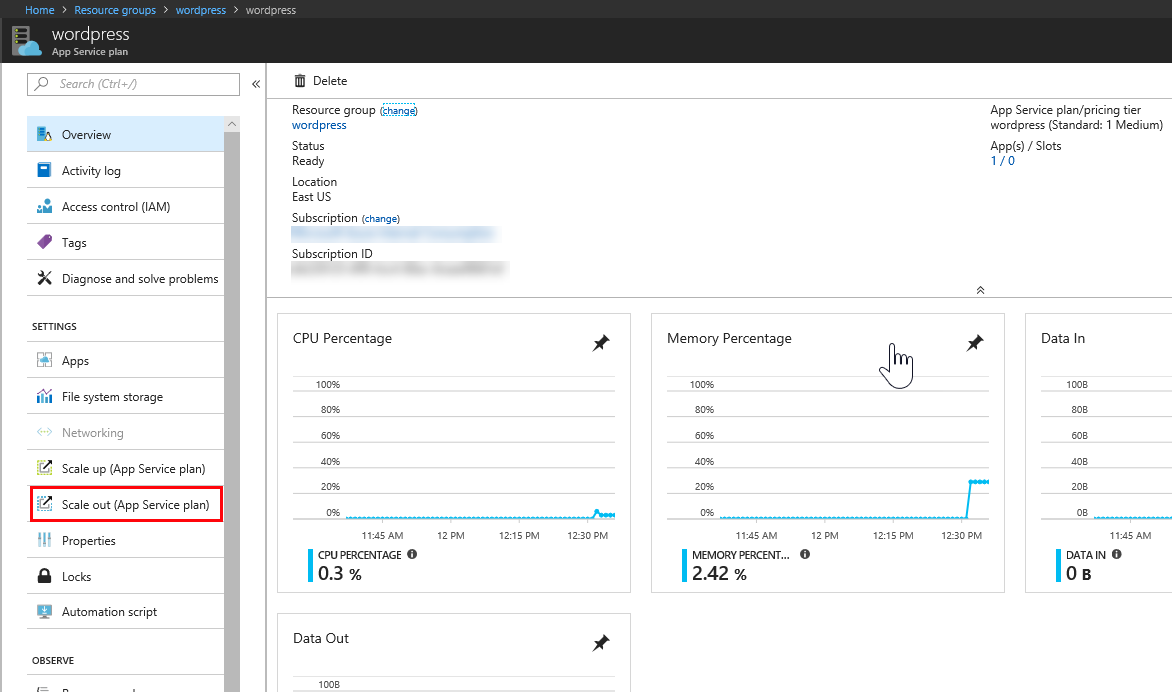
We want to make sure that we have solid availability for our web app. So, let’s go ahead and scale out to a second instance. Keep in mind that Azure takes care of the load balancing for us.
- Navigate to your newly created App Service plan. In my case, it’s wordpress.
- On the left menu, click on Scale out.

- Increase the Instance count to 2. (NOTE: If you want to enable autoscale and define some rules for such, go ahead.)

- Click Save.

Always-On
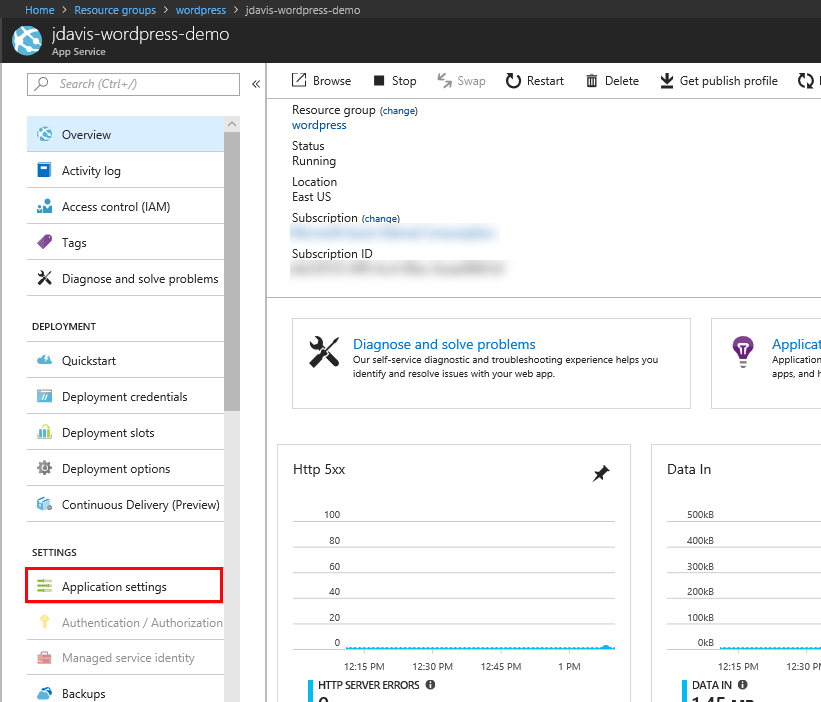
Let’s make sure that our app doesn’t cycle down due to inactivity. Keeping our app active will incur some additional costs, but it allows our users to receive immediate access to the site without waiting for the site to “spin up”.
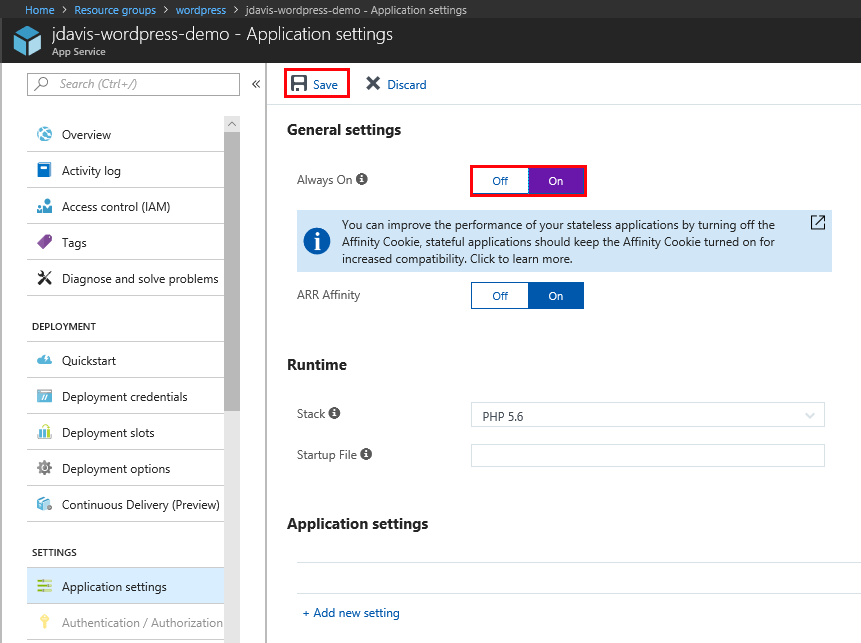
- Navigate to your newly created App Service. In my case, it’s jdavis-wordpress-demo.
- On the left menu, click on Application settings.

- Turn Always On to On.

- Click Save.
The current state of my resource group/resources looks like the following picture.
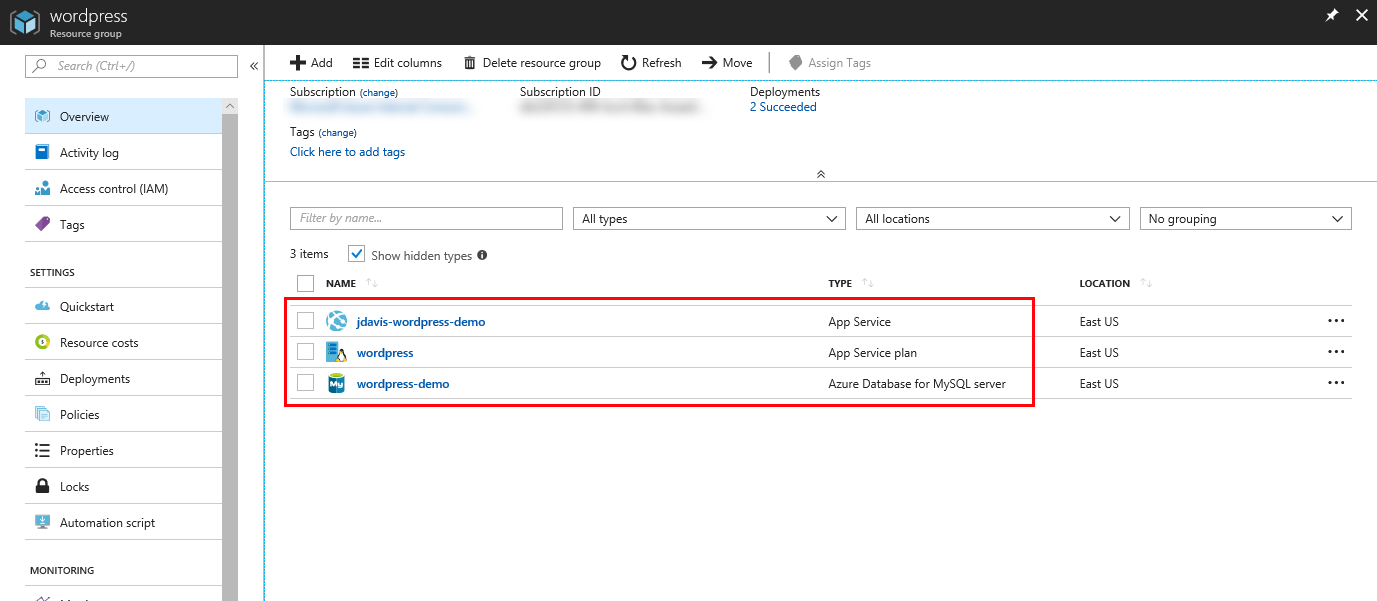
There’s a MySQL server, an App Service Plan and a single App Service. Again, keep in mind that if I wanted to run multiple WordPress instances, the only two things I would need to do are: 1) add a new database to the MySQL server instance; and, 2) add a second App Service (Web App) to the current App Service Plan. Optionally, depending on workloads, I could scale up/out my MySQL server and App Service plan instances.
Nice Explanation! Thanks for sharing this valuable article with picture visually which easy to understand.
wow !!!! that guide so EXCELLENT, thanks for dedicating part of your time to create a guide so detailed and easy to understand, I really had hours looking for how to perform the process of installing wordpress in azure on the internet and none of the guides I found convinced me, but this guide is above all, thank you.
One question, if I wanted to host several wordpress websites in the same web services, creating sub folders in the wwwroot portfolio, would there be any variation in the process ?, and the configuration of the custum domain as it would be configured? or do you recommend improve creating a web services for each wordpress installation?
Thank you,
Just to clarify… a web (“App”) service and a web site are two different things. The service is the host process (RAM, CPU, etc.) in which your site is running. When you created a web site, a service was also (automatically) created for your site to run in. The service is what you are billed on. Therefore, to answer your question, you can have a single App Service with multiple websites. Install a unique instance Word Press on each site and associate a domain with each of those sites. Then, all of your sites will run in the same App Service and you’ll only have to pay for one service. Hope this helps, let me know if you have any other questions.
[…] Install WordPress on Microsoft Azure PaaS […]
In the Azure marketplace there is now a Windows Server 2016 image with WordPress that comes pre installed with MySQL, IIS & phpMyAdmin as an alternative option: https://azuremarketplace.microsoft.com/en-us/marketplace/apps/cloud-infrastructure-services.wordpress-windows-2016?tab=Overview
The post configuration guide can be found on : https://cloudinfrastructureservices.co.uk/how-to-setup-wordpress-on-windows-2016-in-azure/
Andrew,
Great job on your marketplace image. It looks pretty good if someone is interested in a single VM, Windows-based solution. However, there are a few issues, in general, with your approach.
– Windows servers require adequate licensing. Most Linux distros do not.
– This architecture, by utilizing VMs, doesn’t scale well, especially with how WP saves images and media. First, in order to scale, you would need to create a VMSS with an image. Second, you’d need to configure WP to use blob storage or attach Azure Files to the VM and configure the correct path for WP’s media. This way, all WP instances in the VMSS would have access to the media files.
– There is some performance lag with ISAPI and processing PHP within IIS. Perhaps this not a big deal for Windows shops who require Windows machines, but still exists nonetheless.
– You’re now looking at an IaaS solution with multiple components that require human maintenance and manual patching. Besides licensing, you are looking at additional costs in human resources. Most of this overhead (and cost) is eliminated with a PaaS solution.
– DevOps is slightly more complicated because you’ll now need to create additional instances for Dev, Test, Stage, etc. With App Services, you can utilize deployment slots. Then, switch environments very easily with the click of a button.
Thanks for the feedback though!
Hi Boss! I followed this and am getting Error 404, not sure what I’m doing wrong. Can you help?
Where are you getting the 404? What step?